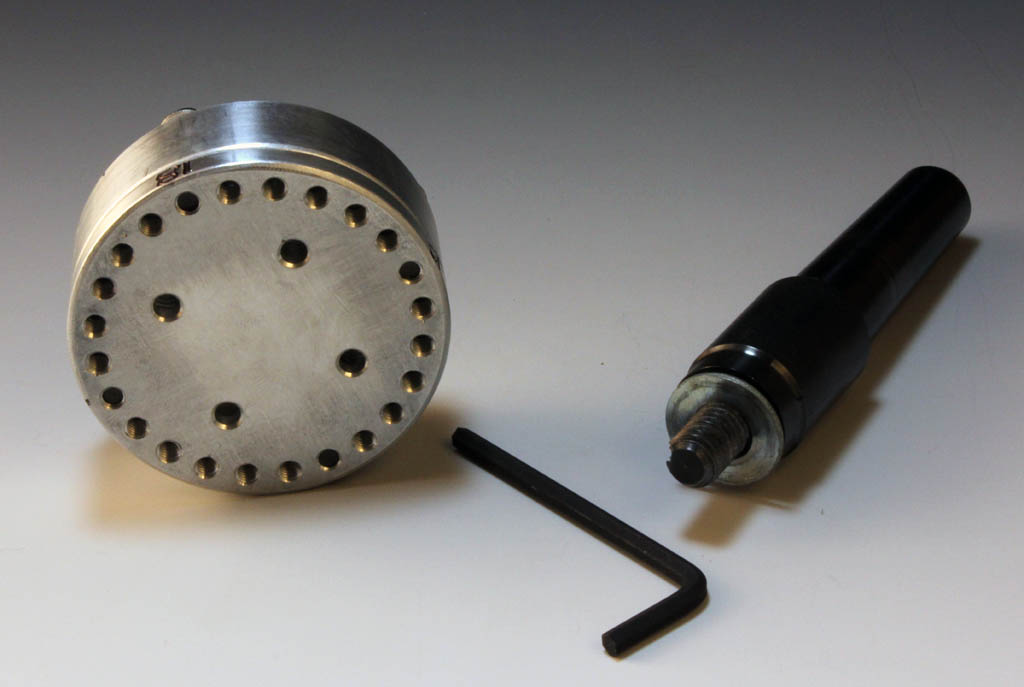
 I see new jigs and gizmos all the time, but this one caught my eye as being rather unique and fun. Liked it so much I bought one and asked to carry them.
The jig is simple, two pieces that bolt together. One, the face plate for attaching the wood to with 4 countersunk holes for a #6 screw, and the back that screws into a morse taper or spindle mount with a 3/8-16 screw. The wood is fastened to the face plate with small wood screws or a high quality double sided tape. I would recommend a waste wood screwed to it and then the “money” wood glued onto the waste block. The back of the pendant jig has 8 offset holes on it to vary the amount of swing and widen the swath of cut. Additionally, the front plate has 24 index holes and can be rotated around itself. Use a good hard wood that will hold a crisp detail.
With your wood attached to the front and using the #1 back hole (unmarked but the center), bring up the live center for support and round out your blank. I would recommend using a shear scraper of shear cut to finish it off and sand smooth the little spindle blank you have just made at this point.
(This is the older version. New one has a screw that can be inserted in the middle for offset Bottle Stoppers)
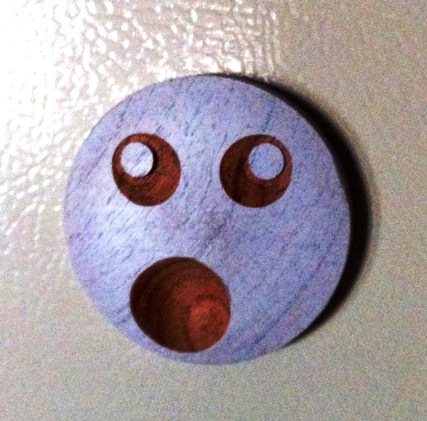
For this exercise we will make a “Scream” pendant.
Start with the indexes aligned at home (0,0). With the morse taper on center (1 if you will) round out your wood block, the basis of the pendant. Unscrew the assembly and screw the back in at #4. Make sure the index marks of the faceplate and pendant back are both aligned at 0.
 Remember that you will be turning a block off center. Keep the lathe RPMs low enough to make a clean cut. Even the largest most balanced lathe will vibrate during off center turning. ALWAYS KEEP YOUR HANDS IN FRONT OF THE TOOLREST. The wood is spinning eccentric and can damage tools or worse quite easily.
Mark with a pencil the center point. If the face is domed, you can’t make a full circle. With a fine parting tool, plunge in to the left of the pencil mark the width of the “eye” of the face. Now , cutting with a tool will take some practice since the more the face is domed, the more unsupported the cut is and tool bounces. Try different tools at different angles to find out what works best for you. With the first eye cut, remove the allen screws that hold the faceplate to the jig and rotate the faceplate until 0 on the jig lines up with 6 on the face plate. Tighten the screws up and align the toolrest again. Cut eye # 2 the same way you did the first. The trick is to sneak up on cut until both eyes are the same size.
For the mouth, take out the allen screws and move the faceplate so that the index on the plate is between 12-18 and the pendant is on 0. This cut goes to the center of the “mouth”. When you are satisfied with the size of the mouth, unscrew the assembly from the morse taper and remount at #1 (centered).
Use a thin parting tool and carefully and gracefully part down to the center. You can finish the back by putting in a small vacuum chuck and making light cuts. Additionally, you can drill a recess with a forstner bit for a magnet to keep the fridge organized.
For some entry videos on the usage, check out these on Ed Davidson’s video page
We don’t sell these anymore, but Ruth does and you can buy them here